Posts about: simple nail art

31/07/2013
wowza I love white nails.
I find then so chic and simple.. I just can't resist reaching for my white polish of late.
I decided to jazz them up with a simple abstract design inspired by wah's keith haring nails! it's a fun nail art with no set design just draw on some geometric shapes, dots, swirls and get creative!

you'll only need two things; a good white polish and a nail art pen, I've used models own snow white with their black nail pen for mine.

just make sure to wait for the white base coat to dry before drawing a rave on your nails!
caroline x

24/07/2013
my inner child loves fruity fingers so I decided to paint some strawberry nails at the weekend!
I thought I'd share the tutorial with you as it's quite easy and a fun option for summer (I hope you'll try them too!)

start off with a red base coat, I've used my go-to va va voom red, the gorgeous models own red alert, this polish has a great formula and only requires 1-2 coats (if you're looking for a classic red this is the one!)

once dry you'll need to paint on the strawberry leaves, I've just used the corner of nail polish brush but you can also use a nail art pen/brush to do this.

lastly you'll need to add some white dots to suggest the strawberry seed pattern! I used my white models own nail art pen but you can use a small dotting tool! slightly drag down the circles of white polish so the shape becomes more like a teardrop.
seal with polish and you're good to go!
I hope you like them!
back soon
caroline x

31/05/2013
I'm always on the hunt for the 'perfect' pink nail polish.. a classic go-to nail colour.
I love bright bold shades on my nails especially in the summer and this orly polish I received from beauty expert is so darn pretty!

on first look I wasn't sure if I'd like this one! it has a slight shimmer finish in the bottle and I wasn't sure how it would translate on my actual nails.
fear not I was wrong aha! it's beautiful on and I LOVE the colour, a classic hot pink but just light enough to be uber feminine.

the polish itself applies really well, the formula is rich and smooth. this is two coats swatched here and it dries quickly, I didn't find that it chipped easily (I think I had it on for three days in total)

I couldn't resist adding a little daisy nail art to mine to brighten up a dull afternoon, you can see the tutorial for this look over on beauty expert! I think this will be the shade I reach for when I'm having a pamper day.. a perfect princess pink.
you can have a peek at it yourself here!
what do you think? are you a pink nail kinda gal?
caroline x

07/05/2013
eeeeeek, I've been so excited to share this post with you guys!
I was recently contacted by an LA based company called scratch, an awesome duo of ladies whose mantra is simply to create current, fun and wearable nail wraps, sounds good huh?
when scratch asked if I'd like to design a collection for them and I said HELL YEAH and so the scratch & burkatron collaboration began...yipee!
I designed four wraps in total, the watermelon design has already sold out (on pre release) I couldn't quite believe my eyes when it was reviewed on zooey deschanels website hellogiggles and they were all snapped up!
I'm super duper excited to announce that the main collection is officially launching TODAY on scratch (happy dance) there are three designs in total and I thought I'd share them with you


I know not everyone has the time or inclination to sit painting their nails so these are the perfect way to adorn your fingers when you've got a busy schedule.


I've used wraps before with mixed results; these ones are brilliant (I'm not being biased aha!) they're thin and flexible like stickers so apply beautifully with no wrinkles or curling. they also last really well so I was seriously impressed with the batches I've been testing out.
This month I have the honour of being the featured artist on scratch and they're will be new collection launching regularly so keep an eye out on their site to see what exciting design are coming up!
I hope you like them; I'm so proud of them and it's been wonderful working with chelsea and kim on this collaboration!
if you'd like to order some of the burkatron range head over to scratch as it's a limited edition once they sell out they will be gone forever *sobs*
which design is your favourite? what do you think to wraps in general?
back soon!
caroline x

24/04/2013
wowza.. it feels like ages since I've painted my nails!
I managed to break two of them in half moving furniture so I had to give all my nails the chop as they were crazily uneven *sobs*
I don't really mind having shorter nails though; I think to keep them healthy you should cut them down every few months (this works for me as mine get weaker the longer they grow) my nails grow fairly quickly helped along by regular use of OPI nail envy (miracle product) and lots of TLC!
I painted these quickly as I was heading out to an event but I thought I'd share them with y'all in case you wanted to try them too!
as I did these at night I didn't photograph the steps but I'll break down the basic idea for you..

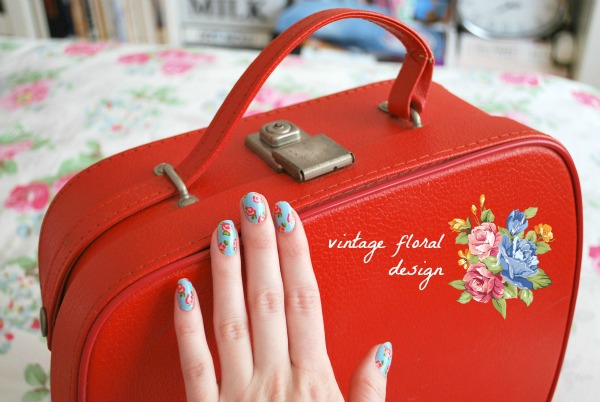
I used models own peach sherbet as the base, a really pretty spring shade; the flowers are just drawn free hand so no nail art pens needed -but you can use them if you'd like!
- take a dark pink polish and draw two large circles on each nail for the flower base.
- now take 2-3 lighter pink polishes and just using the brushes lightly swirl on a few strokes to create the petals (it's works best if you wipe off the excess polish so the brushes are slightly drier)
- repeat the above steps using blue polishes instead of the pink this time!
- dab a white dot in the middle of each flower
- use a green polish to dot small leaves around the flowers
- seal with topcoat!

you don't need to be precise with this nail art as the flowers are quite abstract and vintage inspired! just play with the colours and have fun; it also works on shorter nail just paint less flowers try 2-3 instead of 4.
I'll try and get some more tutorials up soon, I've been so busy this month my nails have been seriously neglected!
back soon!
caroline x
keep up with my nail art & I on... twitter instagram facebook bloglovin'

04/04/2013
spring bling anyone..?
I love these nails; I have to thank you girls at wah for the inspo! I never thought about putting gemstones with polka dots until I saw one of their manicures; I thought it was seriously cute!
it's also not too tricky!
I've used one of my most loved nail polishes models own beth's blue which is just the most adorable pastel blue and a perfect shade for spring.
the gemstones are a collection I've built up from amazon and eBay; you can buy packs for a few pound and they really do seem to last forever!


the hardest part is the polka dots but they're simple if you use a nail art pen or dotting tool.
if you don't have either you can always make a DIY dotter yourself; I've resorted to using pencils dipped in polish to make dots on nails in the past aha!
I hope you like them!
back soon, ps. don't forget there's still time to enter my nail polish giveaway!
caroline x

29/03/2013
time to take matters into my own hands.
since the sun is refusing to arrive I'm ploughing on with my spring/summer nail art in the hope the weather will catch up.... EVENTUALLY!
I love bright nails so I decided to mix up one of my favourite nail art techniques.. the good old gradient! it's a fun and easy thing to master- I did a little tutorial here for you guys to read if you missed it!
once the base gradient dried I added a basic black and white leopard print on top. dab on white circles (I use the brush straight from the polish bottle) and outline with a black nail art pen (I use models own)

I always paint both hands (oh boy is the right hand harder!) but I rarely get a shot of both as my camera struggles to focus on timer, luckily my mum was on hand to snap these!

I tend to use a page from my blogging notebook to dab off the excess colours; I think the leftover palette's are so pretty (plus it shows you how messy I am when I'm painting.. mucky pup!)
if you have any nail art request let me know... I'd love to hear from you!
anyway happy easter holiday folks.. I hope you're all joining me in eating far too much chocolate this weekend? (please do.. I won't feel so guilty if everyone else if doing it!)
back soon-
ps. if you haven't already don't forget to enter my big nail polish giveaway here!!!
caroline x

18/03/2013
if you're anything like me you may be partial to pimping out your nails with a little bit of glitter!
glitter polishes remain my nemesis when it comes to removal ! this type of glitter mani however is a zillion times easier to take off than a full glitter varnish.. hurrah!
I have quite a few glitter top coats but sometimes I like to create my own. I was recently introduced to a new type of glitter called 'flitter' when I was sent some assorted glittler pots by viva la nails (their website is a must see for nail art supplies!)
flitter isnt in many top coats on the market and it's gorgous!! that was all the inspiration I needed to whip up a new glitter combination for my nails!

the glitters I tried were brilliant! I've used standard glitters before but these are much better due to the assorted sizes and textures! I used a combination of shapes and types on my nails including:
flitter (glitter strips)
neon glitter (really vibrant and a mixture of sizes)
I think this manicure works best with an assortment of types, you can put the glitter into a bottle of clear polish and make a bottle of glitter topcoat but you'll probably find the glitter will begin to discolour and bleed into the varnish!
I think it's best to apply the glitter straight to wet nails and seal it afterwards! here's how I did mine:


and lastly:

If you are tempted to try your own custom mix there's a whole range of colours available on viva la nails as well as other nail art supplies!
hope you like them!
back soon
caroline x

10/03/2013
hello OTT nails!
forgive me. sometimes I just can't resist sticking on some shiny bling.. call it magpie syndrome! I felt like trying a darker colour with some stones as I usually opt for pastels and ice cream colours!
a lot of people ask me where I get my decorations from; the truth is I pick them up randomly when I see them on these eBay and amazon shops! a few pound here and there and all of a sudden you have yourself a sparkly collection just asking to be played with!
once I've painted my nails I get my stones out ready and apply a coat on cleat polish to one nail and attach the stones into the wet surface (top tip; pop a tiny piece of blue-tac onto the end of a cocktail stick to pick up the tiny stones) repeat one finger at a time and seal everything with at least 2 coats of top coat to seal!

there's a million and one ways to use these stones so this is just an idea for you guys!
hope you like them!
caroline x

15/02/2013
hello rascals!
today I'd thought I'd share a nail art tutorial with you guys!
I was really excited recently when company magazine asked me to come up with a nail art feature for their weekly edit; once the initial panic over what to paint receded I came up with this tutorial (I have done this once before but I think a few of you may have missed it as it was some time back!) if you're curious you can find out more about the weekly edit here!
you'll need a base colour, a nail art pen/fine brush and an alternate colour for the bows! you don't need to use the same colours as me; this looks good in dozens of colourways!
so here are the main steps:


I hope you like it! I think breaking it down into steps makes this one a lot easier, once you have a basic idea of the shapes you get more confident with it!
if you have an iPhone and want to download the issue or any of the others you can have a sneaky peek here!
if you have an iPhone and want to download the issue or any of the others you can have a sneaky peek here!
(I also wanted to quickly say thank you for following my little blog, I was blown away to reach 800 followers this week! such a big milestone for me; so thank you guys!)
anyway have a great weekend y'all
anyway have a great weekend y'all
I'll back soon!
caroline x

31/01/2013
so this was one of those crazy experiments, a moment of madness perhaps? I have a feeling these are nail art marmite...but they've really grown on me!
my brother described them as 'keith haring meets 80's shell suit' ...which put a big smile on my face.
there's a few art influences here from patrick heron to kandinsky but don't fall asleep on me just yet I promise not to bore you with history; the basic idea is really to play around with colour and have a little fun!
I just painted a white base coat and then added dashes of colours over the top. be random, experiment and let the paint do the talking! I added a few zig zags, dots and lines with a black nail art pen and voila.. finished!

hope you like them!
back soon!
caroline x

28/01/2013

the snow has melted, spring is in the air (I just purchased my first bunch of daffodils so it's official!) I feel like painting daisies is the sensible option ..plus I'm getting bored of darker winter shades!
so if you want to have a little spring fling with your fingers here's the steps to creating your own! it's not hard it just takes a little patience so grab a cup of tea and some cake and check yourself in the DIY nail salon..


what do you think? it's not to difficult when you break it down (plus they look so cute so it's worth the effort!)
hope you like them... back soon!
caroline xx

19/01/2013

another easy peasy nail art idea for you guys. I've tried this one before and unlike rhinestone embellishment this is a lot easier to work with!
the pyramid studs lay flat into the polish so you wont be getting these caught in your hair or clothes hurrah! they also last well, I took mine off after 3 days (they were in perfect condition though so would have lasted longer!)
it's a really easy technique, simply paint your base colour and wait to dry. I've used models own peach sherbet here. I bought my studs in a nail art wheel from misguided but there are also loads on eBay here!
apply a line of clear polish over the base colour (where you want the studs to be) and push the studs into the wet polish; it acts like nail glue and hold them in place as it dries. try to get all the stud edges into the polish (I used a toothpick with a tiny piece of blu-tac on the end to pick up the studs and press them in)
seal with several layers of a good top coat (I could not recommend seche vite more, amazing stuff) and you're finished!

these nails really look better in the flesh! the light reflecting off the gold makes them tricky to photograph so I haven't really done them justice with these pics aha!
anyway I hope you like them!
back soon
caroline x

16/01/2013

hi guys! good week? it's been snowing here yipeee!
I decided the safest (ok, warmest) option was to stay indoors and repaint my bedroom this week; my poor old nails were a hot mess afterwards so I decided to clean them up and give them a lick of paint too..
I love the monochrome trend; I've been harbouring a crush on a black & white skater dress all month (hurry up payday!) I thought I'd paint my nails to match since I don't have the dress to twirl around in!
I wasn't sure what tribal/aztec nails would look like paired down to basics but now I'm converted. I think this is a good nail art for shorter nails as you can just remove a few rows of the pattern and they'll keep the proportions!
tempted to try them? read on..
so here's what I used:

and here's the steps I followed:

- paint a white base coat, I used two coats of models own snow white polish
- next draw horizontal stripes across the nail to create sections. if you have shorter nails draw on less; I drew 4-5 on mine but if your nails are shorter draw 3 or 4.
- now draw a different pattern in each section, I changed between polka dots, squares, zig zags and vertical lines.
- seal with a good top coat! leave to dry and kapow.. you're good to go!

I hope you like them!!
back soon
caroline xx
Subscribe to:
Posts (Atom)

Social Media
Search