Posts about: art and craft

21/09/2012

eeek I love this DIY!
I've seen loads of these little pendants on pinterest and wanted to give it a go myself.
It's easy peasy and cheap as chips to make. it would be a cute little present for a friend or loved one but I have a feeling I'll be keeping most of them for myself..
you don't need much for this project, the main purchase is little cork topped glass bottle which are only a few pound with shipping on eBay

you'll need,
glass bottles with cork stoppers
a long chain, I just recycled an old necklace.
wire
pliers
paper
string

take your paper and cut to fit inside the bottle. write on your personal message (mine is a secret!)
tie your message with string and place into your bottle.

use a toothpick to make a small hole through the cork stopper.
thread the wire through and make a loop at the bottom to secure.
thread your chain onto the other end of the wire, make another loop over with your pliers to keep everything in place.

that's it! your message in a bottle is now ready to wear or to give to a friend.. (I told you it was easy!)
hope you have fun if you try this out for yourselves!
caroline x

08/08/2012

holding up my hands here.. I've become obsessed with jars! kilner jars, jam jars you name it I'm trying to make something with it. I went looking for some last weekend and found a pack of these adorable mini screw top jars in dunelm
I wanted to make some tea light holders and they work out about £1 each (not bad hey) I came up with a few versions and I'd thought I'd show you a couple!

lace decorated!
easy peasy, just wrap a small piece of lace trim around the jar and glue into place, I also wrapped some string around to decorate. I think these would make cute table decorations if you wanted to add some handmade name tags!

fabric lined!
these are fun because they're slightly messy aha! take some fabric remnants and cut into inch wide strips (make the length an few cm more than the jar height)
use a brush and paint your strips of fabric with pva glue. place the wet strips inside the jar with the pattern side facing out. work your way around the inside of the jar covering the glass completely with fabric. trim off any excess!
once dry pop in your tea light and you have some cute handmade little lanterns!
(safety officer moment) don't leave lit candles unattended, I don't want any fire hazards on my watch peeps!

hope you like them!
caroline x

05/08/2012

so excited about this DIY! I hoard jewellery and am always looking for ways to store it..
I came across a great DIY on pinterest where someone had covered the inside of a frame with chicken wire and hung all their earrings on it. I don't wear earring's but have a million and one necklaces so I changed a few things and came up with this version!
Its so simple all you need is a frame, some fabric, glue and some small screw hooks.
take apart your picture frame and remove the glass (you won't need this again!) take the back of the frame and use it as a template to draw around a piece of fabric. cut the fabric rectangle out and leaving a few centimetres excess. I used some cath kidston fabric that I'm a little bit in love with!
lightly cover the back of the frame with glue and place on the fabric, rub out any air bubbles and tuck the excess fabric over the back and glue down.
place the fabric coated backing into the frame again. now all you need to do is screw in some picture hooks and hang up your favourite necklaces!

cute huh? one pretty jewellery display in under an hour! If you don't have any fabric you could always use some wallpaper or patterned paper instead!
hope you like it!
caroline x

27/07/2012

just a quick little project using washi tape! if you've not heard of washi it's basically japanese masking tape! it's comes in dozens of cute pattens it's re usable and really great for crafting (honestly there's a million and one things things you can use it for!)
I have too many notebooks; due to my obsession for writing lists I have at least five hanging about but I get bored of them and buy new ones aha! now I have washi tape I'm up cycling my old neglected books and giving them a second chance..
here's my quick and easy notebook makeover:

hope this has given you some ideas for the weekend, if you want to get yourself some washi to play with I definitely recommend etsy it's where I get all of mine!
see you guys soon
caroline x

25/07/2012

this is a quick and easy little project if you have half an hour to play with! I came across it on pinterest and did this while sunbathing in the garden (productive tanning!)
you only need a few items, some fabric remnants, cotton wool balls, glue, card, and a glass screw top kilner jam jar (these are available in the baking department of craft stores like hobbycraft or dunelm)

remove the kilner lid, its in two parts! draw around some fabric using the lid as a guide, cut the fabric diameter about 1-2 inches larger than the lid.

place the fabric circle pattern facing downwards, sandwich a small handful of cotton balls between the lid and the fabric. push through the inside hole of the screw top part of the lid. trim and glue down the loose fabric edges (a glue gun is the quickest way to do this, I used fabric glue so had to wait for it to dry!)

cut out a circle of card a smidgen smaller than the lid and glue this down inside to cover over the fabric that's showing. now just screw the lid back onto the jar and you're finished!
you have a cute pincushion lid and can put your thread, ribbons etc inside, it's a really handy little storage jar!
caroline x

23/07/2012
I've been working on a little project that I wanted to share with you guys! I'm not the most competitive person but when I was asked if I wanted to take part in a craft competition I jumped at the chance!
home crafts supply all kinds of lovely art and craft material and they offered to send ten bloggers a selection of yarn and wool to play with... the rest was up to us!
I wasn't sure what to expect but when my parcel arrived I was super excited! inside was a collection of wool and the most beautiful rainbow sari yarn I have ever seen (I'm actually in love with this stuff!)
I wanted to create something that didn't involve knitting and would be easier for non crafters to try.
so here it is... a rope bowl! sound crazy? aha maybe, but to my delight it actually worked!

here's how I did it!

before you begin, take a bowl and cover it with clingfilm, if you have some vaseline wipe a little over the clingfilm, it will prevent the wool from sticking. (this bowl is your template and holds everything in place while it drys!)
now the fun part! you need watered down pva glue (two parts pva to one part water) now quite simply dip your wool into the pva and squeeze off the excess! turn your bowl upside down and start to wrap your pva soaked wool all around it (I started at the base of the bowl and worked my way wrapping down.)
it's messy but ridiculously fun! once the bowl is fully covered with string leave to dry, I left mine for 48hrs after which it was rock solid! when I finally slid off the bowl I was delighted to find the string had not only set but was really sturdy!
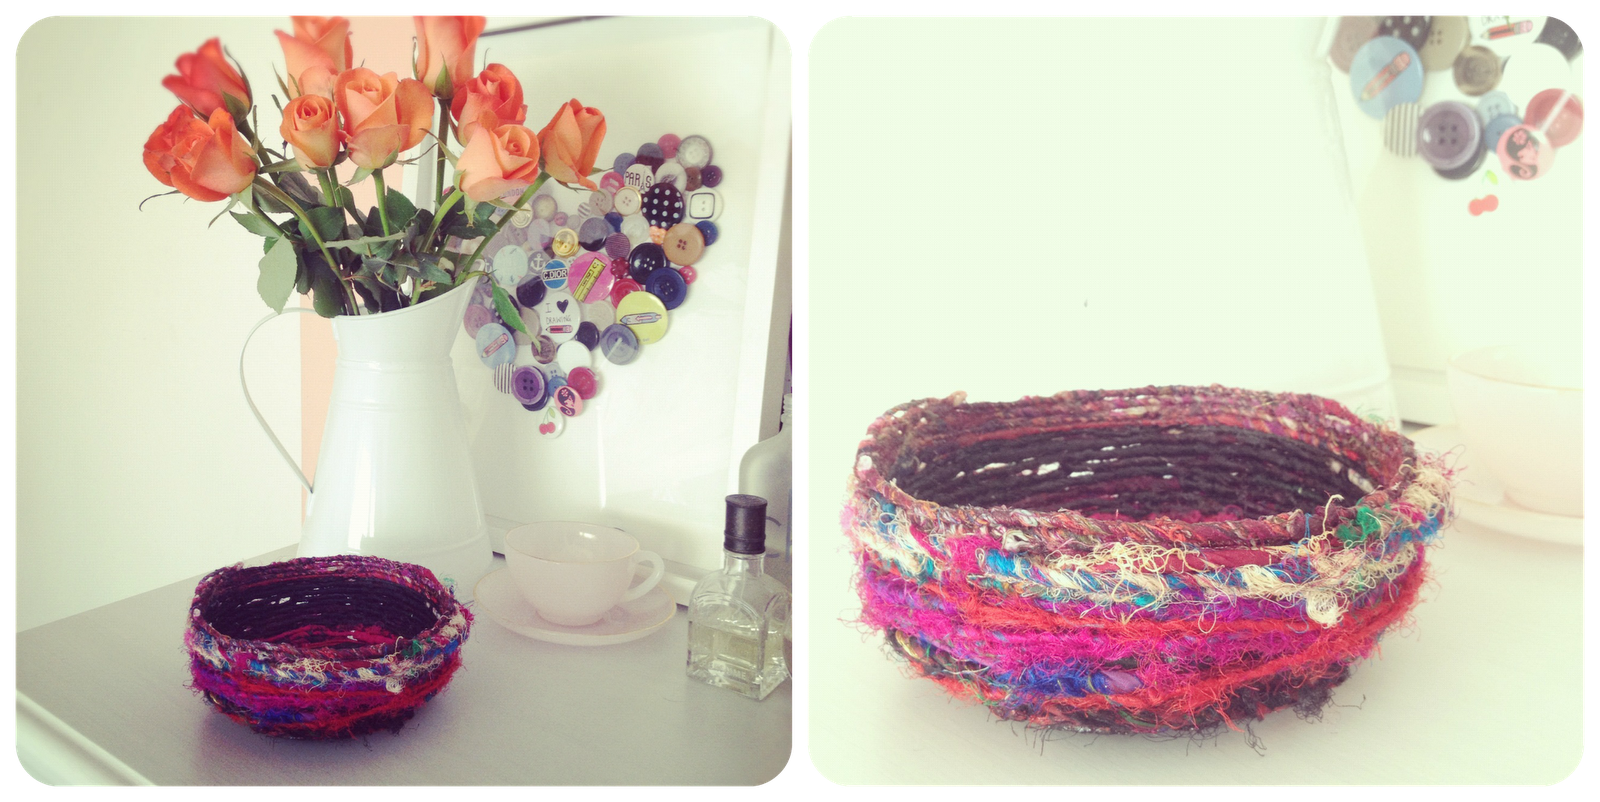
I love it! what do you think....?
PS: there's lots of things you can use wool, string or yarn to decorate! I made a few little things with the remaining materials I had left over:

notebooks, simply wrap yarn around the existing cover!

empty glass jars, another victim of my new wrapping obsession!
I hope this has given you some ideas for future projects! I really recommend the pva rope bowl, it's a really fun afternoon project to do with children (or big kids like me!)
caroline x
Subscribe to:
Posts (Atom)

Social Media
Search