Posts about: burkatron nails

14/08/2015
I've painted watermelons, bananas, strawberries and half a dozen fruity nail variations but I've never painted pineapple nails until now (can you believe it? what a slacker!)

24/09/2013
yikes my nails have been so neglected!
I love to give my paws a manicure every week but since I started decorating my new house I've not had much time for pampering! just keeping them from breaking as I'm sanding down floors is an achievement ...having a few hours free to file and paint them is a bit of a treat!
this is quite a quick nail art so thought I'd share it with you guys!

start off with a white base coat, I've used topshop spilled milk polish here...
take a pink and yellow polish and draw on alternate circles using the brush, space them evenly I have 3-4 circles on each nail.
once dry take a black nail art pen (mine is from models own and I really recommend theirs) roughly outline around the circles and add a small flick in the center to suggest the petals.

use a dotting tool dab on green polish to add the leaves, seal with topcoat and you're all done!

I did these fairly quickly so I'm sure they would look neater if you try them yourself!
now all I have to do is try not to chip them whilst I'm decorating... fingers crossed!
caroline x

01/09/2013
hello guys!
today I have some geometric nail art that I've created using some polishes from nailgirls! I also have a little giveaway for you hurrah!
nailgirls kindly asked if I'd like to be their nail art blogger of the month and create a nail art for them, they've also offered some polishes for you guys to win too... (pop down to the end of the post if you want to enter!)

I decided to come up with a really simple and bold design that would make the most of the two nail polishes I'd picked canary yellow and bright tangerine!

the formula of the polishes is really good, I've always found yellow a difficult polish and this is the best one I've tried to date, the coral formula is fantastic needing practically 1 coat for full coverage (wowza!)

I added some studs and a slick of topcoat to finish off the design!

so onto the fun part the GIVEAWAY!!
we have two nail polishes and a nailgirls top coat up for grabs and the winner gets to choose which colours they receive!
this giveaway is for burkatron followers in the UK only due to new postal restrictions on sending polishes overseas!
simply enter through the rafflecopter box below and follow the entry requirements... good luck ladies!!
fingers crossed!
caroline x

07/05/2013
eeeeeek, I've been so excited to share this post with you guys!
I was recently contacted by an LA based company called scratch, an awesome duo of ladies whose mantra is simply to create current, fun and wearable nail wraps, sounds good huh?
when scratch asked if I'd like to design a collection for them and I said HELL YEAH and so the scratch & burkatron collaboration began...yipee!
I designed four wraps in total, the watermelon design has already sold out (on pre release) I couldn't quite believe my eyes when it was reviewed on zooey deschanels website hellogiggles and they were all snapped up!
I'm super duper excited to announce that the main collection is officially launching TODAY on scratch (happy dance) there are three designs in total and I thought I'd share them with you


I know not everyone has the time or inclination to sit painting their nails so these are the perfect way to adorn your fingers when you've got a busy schedule.


I've used wraps before with mixed results; these ones are brilliant (I'm not being biased aha!) they're thin and flexible like stickers so apply beautifully with no wrinkles or curling. they also last really well so I was seriously impressed with the batches I've been testing out.
This month I have the honour of being the featured artist on scratch and they're will be new collection launching regularly so keep an eye out on their site to see what exciting design are coming up!
I hope you like them; I'm so proud of them and it's been wonderful working with chelsea and kim on this collaboration!
if you'd like to order some of the burkatron range head over to scratch as it's a limited edition once they sell out they will be gone forever *sobs*
which design is your favourite? what do you think to wraps in general?
back soon!
caroline x

01/05/2013
if you're a neon fan or channelling the 90's vibe these nails may be for you...
inspired by a WAH version I saw on instagram I decided to give them a whirl! I have to say probably best avoid this look if you're off to a wedding but I think they're perfect for casual days... and what the hell, it's good to mix it up a little sometimes!
here's how I painted mine:


as you can see it's really just a simple technique of dabbing colour and adding a few lines with my models own nail art pens to suggest running drips.. easy peasy!
don't forget to seal with a good top coat and you're ready to rave....
back soon
caroline x

24/04/2013
wowza.. it feels like ages since I've painted my nails!
I managed to break two of them in half moving furniture so I had to give all my nails the chop as they were crazily uneven *sobs*
I don't really mind having shorter nails though; I think to keep them healthy you should cut them down every few months (this works for me as mine get weaker the longer they grow) my nails grow fairly quickly helped along by regular use of OPI nail envy (miracle product) and lots of TLC!
I painted these quickly as I was heading out to an event but I thought I'd share them with y'all in case you wanted to try them too!
as I did these at night I didn't photograph the steps but I'll break down the basic idea for you..

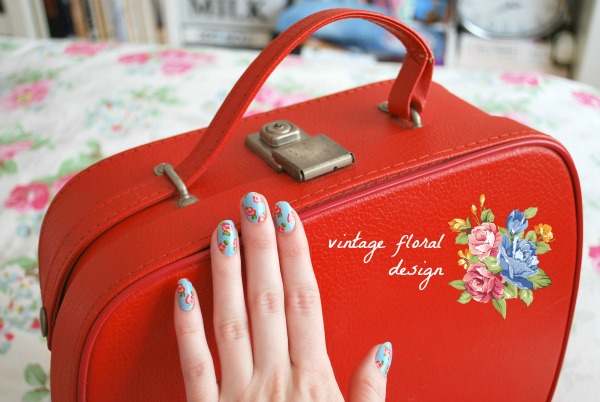
I used models own peach sherbet as the base, a really pretty spring shade; the flowers are just drawn free hand so no nail art pens needed -but you can use them if you'd like!
- take a dark pink polish and draw two large circles on each nail for the flower base.
- now take 2-3 lighter pink polishes and just using the brushes lightly swirl on a few strokes to create the petals (it's works best if you wipe off the excess polish so the brushes are slightly drier)
- repeat the above steps using blue polishes instead of the pink this time!
- dab a white dot in the middle of each flower
- use a green polish to dot small leaves around the flowers
- seal with topcoat!

you don't need to be precise with this nail art as the flowers are quite abstract and vintage inspired! just play with the colours and have fun; it also works on shorter nail just paint less flowers try 2-3 instead of 4.
I'll try and get some more tutorials up soon, I've been so busy this month my nails have been seriously neglected!
back soon!
caroline x
keep up with my nail art & I on... twitter instagram facebook bloglovin'
Subscribe to:
Posts (Atom)

Social Media
Search